In the past two posts, I ordered the parts and tested them. for a TJBot that I'm building
In this post, we assembled the cardboard body of TJBot. My wife helped since she's great at puzzles.
Before you start, we have the following advice:
1. If you ordered a laser cut cardboard like we did, try wiping it off with a cloth or paper towel that is moistened ever so slightly. We didn't do this and found our hands black after a bit. This is probably residue from the burning of the laser cutting.
2. Have tape and a hobby knife ready. We found that some pieces were very difficult to pop out of the cardboard and we had to cut them with a knife first. We also found that just from the normal required bending, one of the bent edges broke. You may find a straight edge (such as a ruler) may help with the bending.
3. Keep in mind that you might have to watch the video a few times and rewind it to watch parts over as you go. We found that we had to do this quite often.
4. Make certain that you have all the parts ready because they will be used in the assembly.
It took us about an hour or so to build the body.
To assemble TJBot, we followed the directions in step 3 on this instructable page.
You can also find the video here on YouTube:
https://www.youtube.com/watch?v=bLt3Cf2Ui3o&feature=youtu.be
In the next session, we'll install the software and get TJBot working!
(Click here for the next posting where TJBot talks)
Here are some photos of our assembly in process.
 |
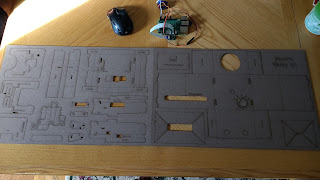
| We unfolded the cardboard to have it in the same position as the YouTube video. Read the notes above about what we suggest that you do before you start. |
 |
| So far, so good! |
 |
| When folding the top of the head, because it folds in over another side, the cardboard split, but we didn't need to tape this part. |
 |
| One of these two uprights snapped apart at the bend and we had to tape it back together (my bad) |
 |
| It still worked find to hold the Raspberry Pi 2 in place |
 |
| The Camera was a bit tricky |
What do you think? Doesn't TJBot look great!


